- Best for
- Small and rental kitchens
- Approach
- Protect access to plumbing
- Start here
- Empty the cabinet and inspect it
The cabinet under a kitchen sink is not an ordinary cupboard. Pipes divide the space, moisture is possible and parts of the plumbing may need quick access. A good layout begins with those restrictions and uses the remaining area without hiding what needs inspection.
This guide uses removable, renter-friendly storage and does not depend on drilling into the cabinet. It complements the broader small-kitchen organization plan by treating the sink base as a service zone rather than general overflow.
Editorial image note: the photographs in this guide are purpose-created illustrations of the organizing principles described. They are not presented as the author’s home, a client project or proof of a tested result.
In this guide
- 1. Empty, clean and inspect the cabinet
- 2. Measure around the plumbing
- 3. Protect a clear plumbing-access zone
- 4. Limit the cabinet to a few safe categories
- 5. Use removable caddies for daily supplies
- 6. Add vertical storage only where it clears the pipes
- 7. Consider a removable base tray
- 8. Set a limit for backup supplies
- 9. Make inspection part of the reset
- Frequently asked questions
1. Empty, clean and inspect the cabinet
Remove everything and check the cabinet base, supply lines, drain connections and surrounding surfaces for signs of active moisture, staining or damage. If you find a leak or a condition you cannot identify, pause the organizing project and contact the property owner or an appropriate qualified professional.
Clean and dry the area using products suitable for the cabinet material. Follow product labels and ventilation guidance.
2. Measure around the plumbing
Record the internal width, depth and height, then measure the usable areas to the left and right of the pipes. Note the door hinges, disposal unit if present, supply lines and any parts that must remain reachable. Measure the opening as well as the interior; a bin is not useful if it cannot pass through the door.
- Left and right usable width
- Depth before pipes or door hardware
- Height below the sink bowl
- Door-opening clearance
- Location of shutoff valves and removable traps
3. Protect a clear plumbing-access zone
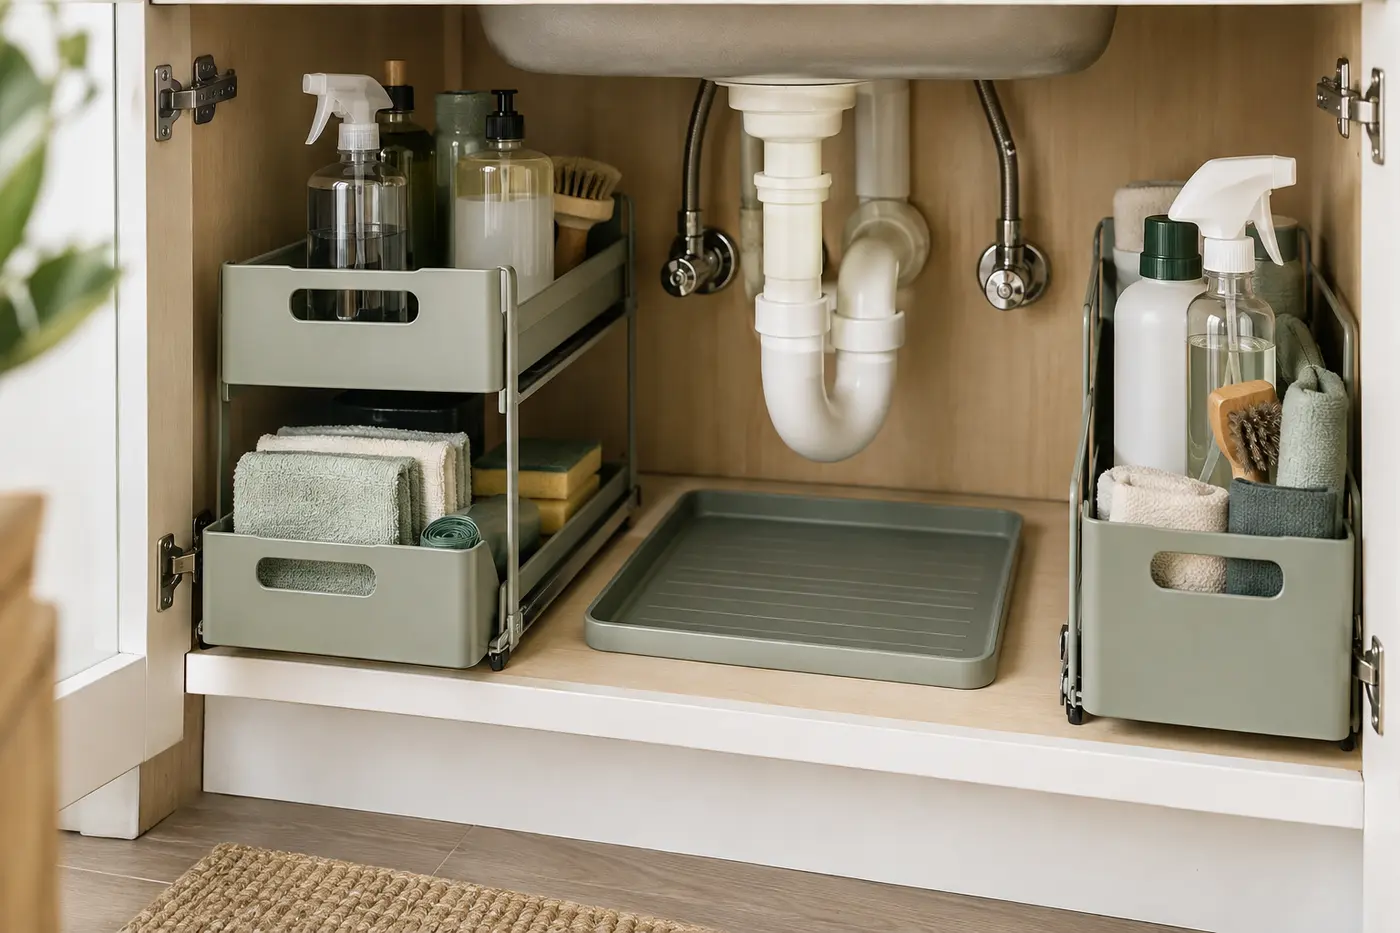
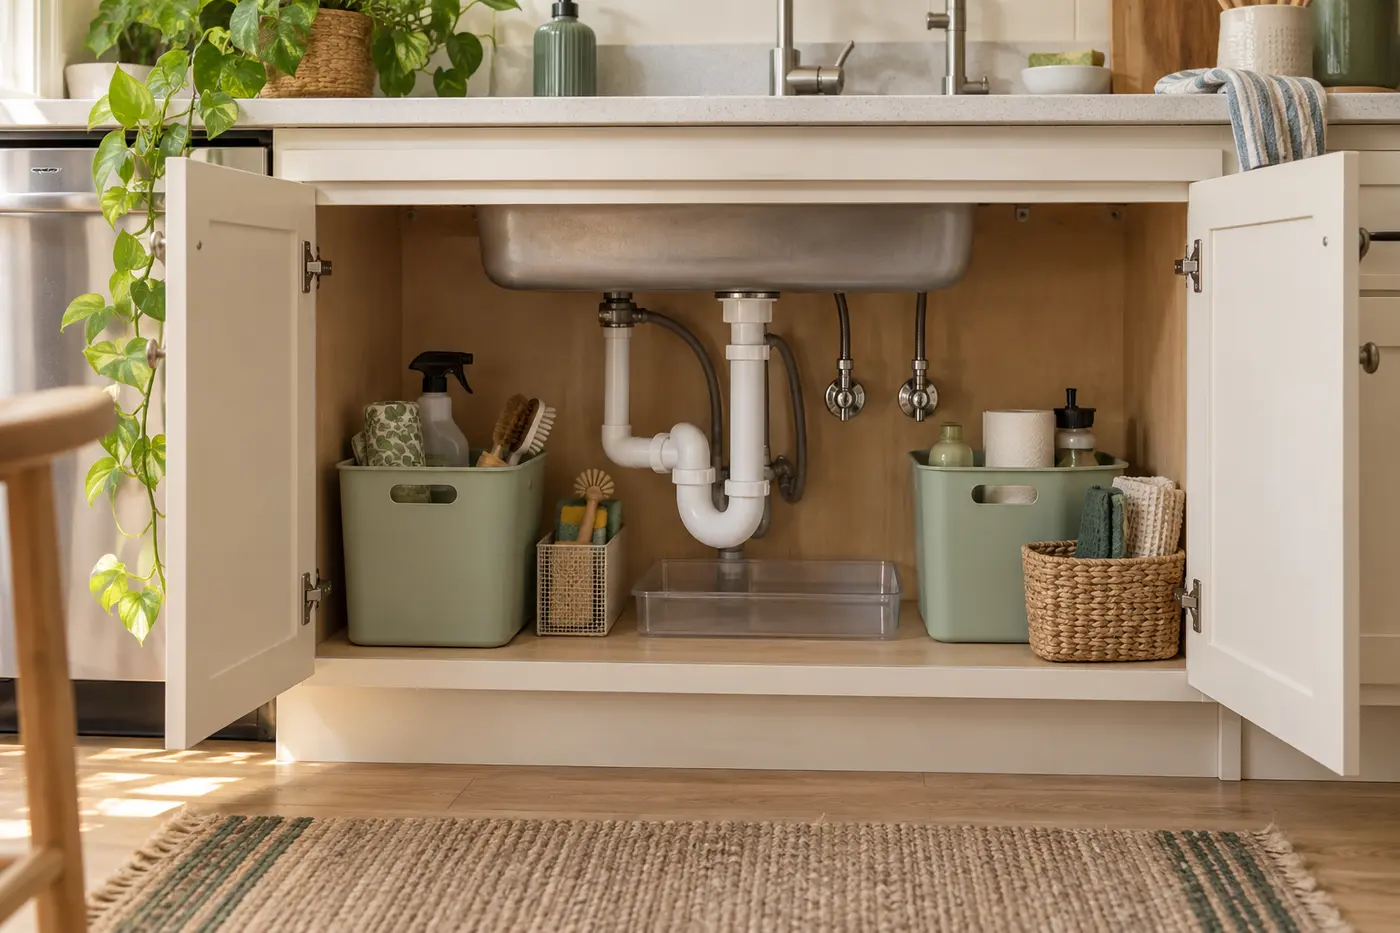
Do not pack storage tightly around the drain or valves. Leave a visible gap so you can notice moisture and remove stored items quickly. Avoid permanent structures that trap pipes behind shelves.
Access comes before capacity
An empty strip beneath the plumbing is useful. It improves visibility and gives a tray or cloth somewhere to sit during a minor inspection.
4. Limit the cabinet to a few safe categories
Good candidates are everyday dishwashing supplies, spare cloths, compatible cleaning tools and a small quantity of backups. Move bulk stock and unrelated household products elsewhere. Never store food beside household chemicals, and follow every product label for storage, incompatibility and child- or pet-safety requirements.
5. Use removable caddies for daily supplies
Group the few items used together in one handled caddy. It can move to the counter during cleaning and leave the cabinet quickly when plumbing needs attention. Keep containers upright and do not decant products into unlabelled bottles.
6. Add vertical storage only where it clears the pipes
A narrow two-tier unit can work on one side of the cabinet if both shelves remain accessible. Check the assembled height and drawer-extension clearance. Door-mounted storage can be useful for light items only when it does not strike the plumbing or prevent the door from closing.
In a rental, choose freestanding, tension-mounted or genuinely removable solutions and follow the lease and product instructions.
7. Consider a removable base tray
A shallow waterproof tray can contain small drips long enough to make them visible and can simplify cleaning. It is not a repair and should not be used to conceal an active leak. Choose a tray that can be removed without dismantling the whole cabinet.
8. Set a limit for backup supplies
Keep only the quantity that fits one defined bin or shelf. Oversized packages can hide plumbing and make daily supplies hard to reach. Review backups before shopping so the same item is not purchased repeatedly.
9. Make inspection part of the reset
During a regular kitchen reset, remove the caddies, wipe the base and look for new moisture or staining. Return only dry items. If the cabinet becomes crowded, use the contained kitchen-decluttering method rather than adding another layer of organizers.
- Keep valves and connections visible.
- Store products upright and in original labelled containers.
- Remove empty bottles and worn cloths.
- Recheck organizer clearance after plumbing work.
Frequently asked questions
What should I store under the kitchen sink?
Keep a limited set of supplies related to the sink and cleaning routine, provided their labels allow that storage location and they remain secured for the needs of the household.
How do I organize under a sink with pipes in the way?
Measure the separate usable spaces around the pipes, protect a clear access zone and use narrow removable caddies or freestanding organizers on either side.
Are pull-out organizers suitable for a rental?
Freestanding pull-outs can be suitable when they fit without permanent installation. Check the lease, product instructions and clearances before using adhesive or hardware-mounted products.
Should I use a liner under the kitchen sink?
A removable waterproof tray or suitable liner can help with cleaning and visibility, but it is not a substitute for repairing an active leak. Confirm material compatibility and removability first.